
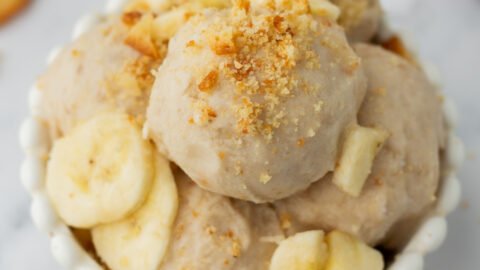
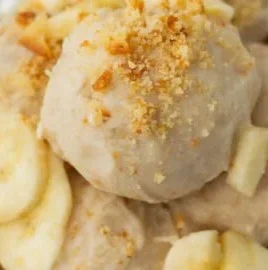
As you take your first bite of the creamy, dreamy Banana Cream Pie Ninja Creami Protein Ice Cream, you’ll be transported to a summertime picnic full of sweet, ripe bananas and fluffy whipped cream. This delightful treat takes just a bit of prep time and requires a 24-hour wait, yet the reward is a delicious, high-protein ice cream that satisfies without the guilt.
This recipe is perfect for anyone looking to indulge in a healthier dessert option while enjoying a rich banana flavor. It’s ideal for warm days or post-workout recovery. Plus, you can easily make this ahead of time and store it for whenever the craving strikes.
Why You’ll Love This Recipe
- The creamy texture mimics traditional ice cream without the added sugars.
- It’s packed with protein, making it a great choice for a post-workout treat.
- Fresh banana pieces add natural sweetness and enhance the flavor.
- The mix-in option allows for customization with your favorite toppings.
What You’ll Need
You’ll need a mix of protein-rich ingredients and some delicious flavor enhancers.
For the Ice Cream Base
- 1 cup vanilla protein shake or milk of your choice
- 1/4 cup plain Greek yogurt
- 1/2 cup mashed ripe banana, about 1 – 6-inch banana
- 2 teaspoons banana cream jello, regular or zero sugar version
- 1/2 teaspoon vanilla extract
- Pinch of salt
For the Mix-Ins
- 2 tablespoons crushed vanilla wafers or graham crackers
- 2 tablespoons chopped bananas, about 1/4 banana
Note: Greek yogurt can be substituted with any other yogurt.
Substitutions & Swaps
- Use plant-based milk for a dairy-free version.
- Swap banana cream jello for traditional pudding mix.
- Any flavor protein shake can be used for variety.
- Substitute crushed cookies with nuts or seeds.
How to Make It
Creating this protein-packed ice cream is a step-by-step process that rewards you with a tasty treat.
Mix Together the Base
Combine all ingredients (except mix-ins) in the Ninja Creami Pint and stir until completely smooth. There may be some banana chunks, but that’s okay!
Freeze
Place the Creami pint in the freezer on a level surface and freeze for at least 24 hours until fully solid.
First Spin
Remove from the freezer and process using the "Lite Ice Cream" setting. The texture may initially appear crumbly or airy—this is normal!
Incorporate Mix-Ins
Use a spoon or knife to carefully scrape down the sides of the pint. Then, create a small hole in the center reaching the bottom and add chopped vanilla wafers or graham crackers, chopped bananas, and 1 tablespoon milk or Fairlife.
Re-Spin
Process again using the "Mix-In" setting to fully incorporate mix-ins and achieve a smooth, creamy consistency.
Enjoy
Serve immediately or store any extras in the freezer. For best results, use a spoon to press the ice cream into a flat, even surface before refreezing.
How to Store It
Fridge: Store in an airtight container for up to 3 days.
Freezer: Yes, perfect for longer storage.
Reheat: Let sit at room temperature for 5-10 minutes before serving.
Tips for Best Results
- Ensure your banana is very ripe for the best sweetness.
- Use a blender for a super smooth base if needed.
- Always freeze the mixture for a full 24 hours to ensure it sets properly.
- Adjust sweetness with additional banana or jello if desired.
Serving Suggestions
- Pair with sliced fruit for a colorful dessert platter.
- Serve alongside a scoop of nut butter for added protein.
- Great for a summer garden party or barbecues.
Leave a Comment