
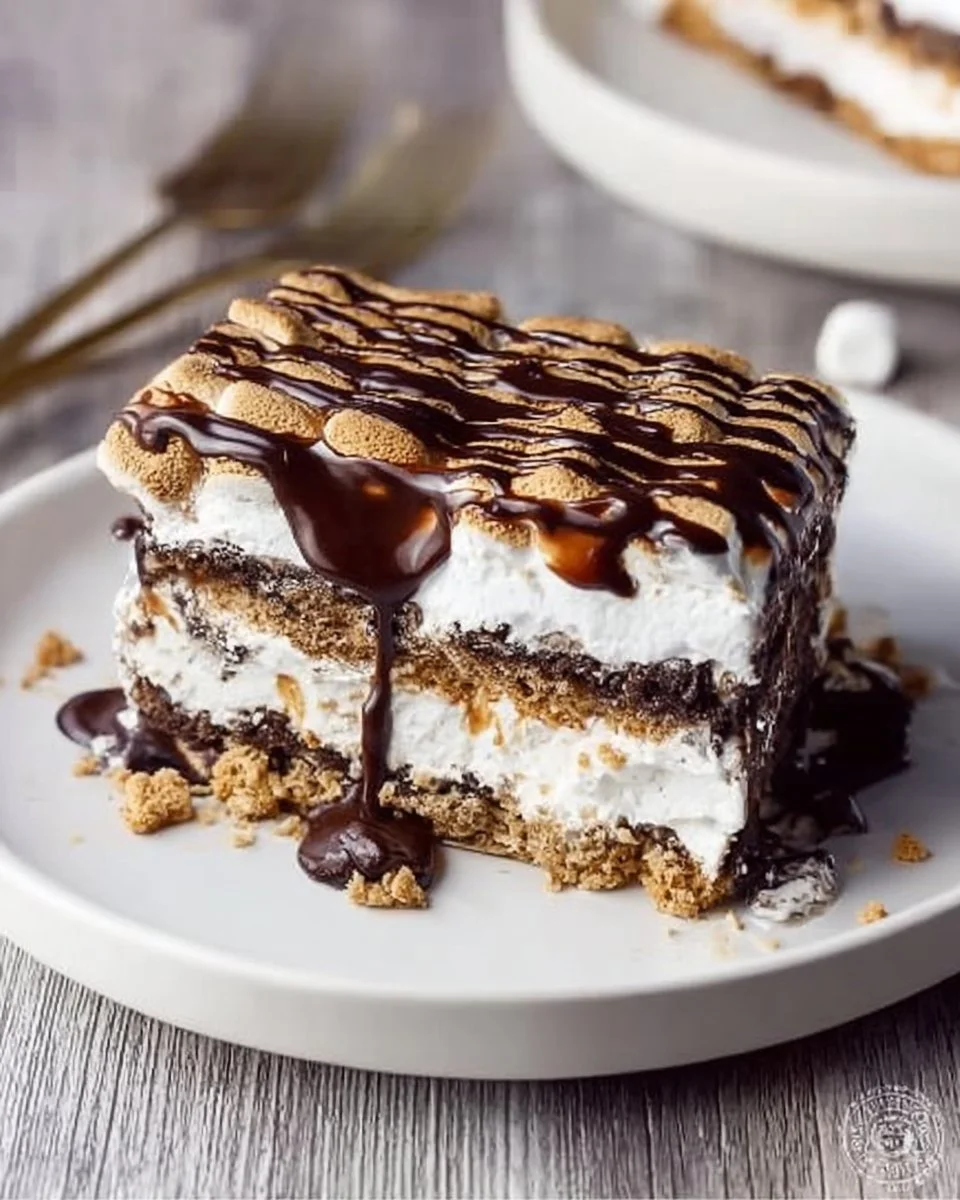
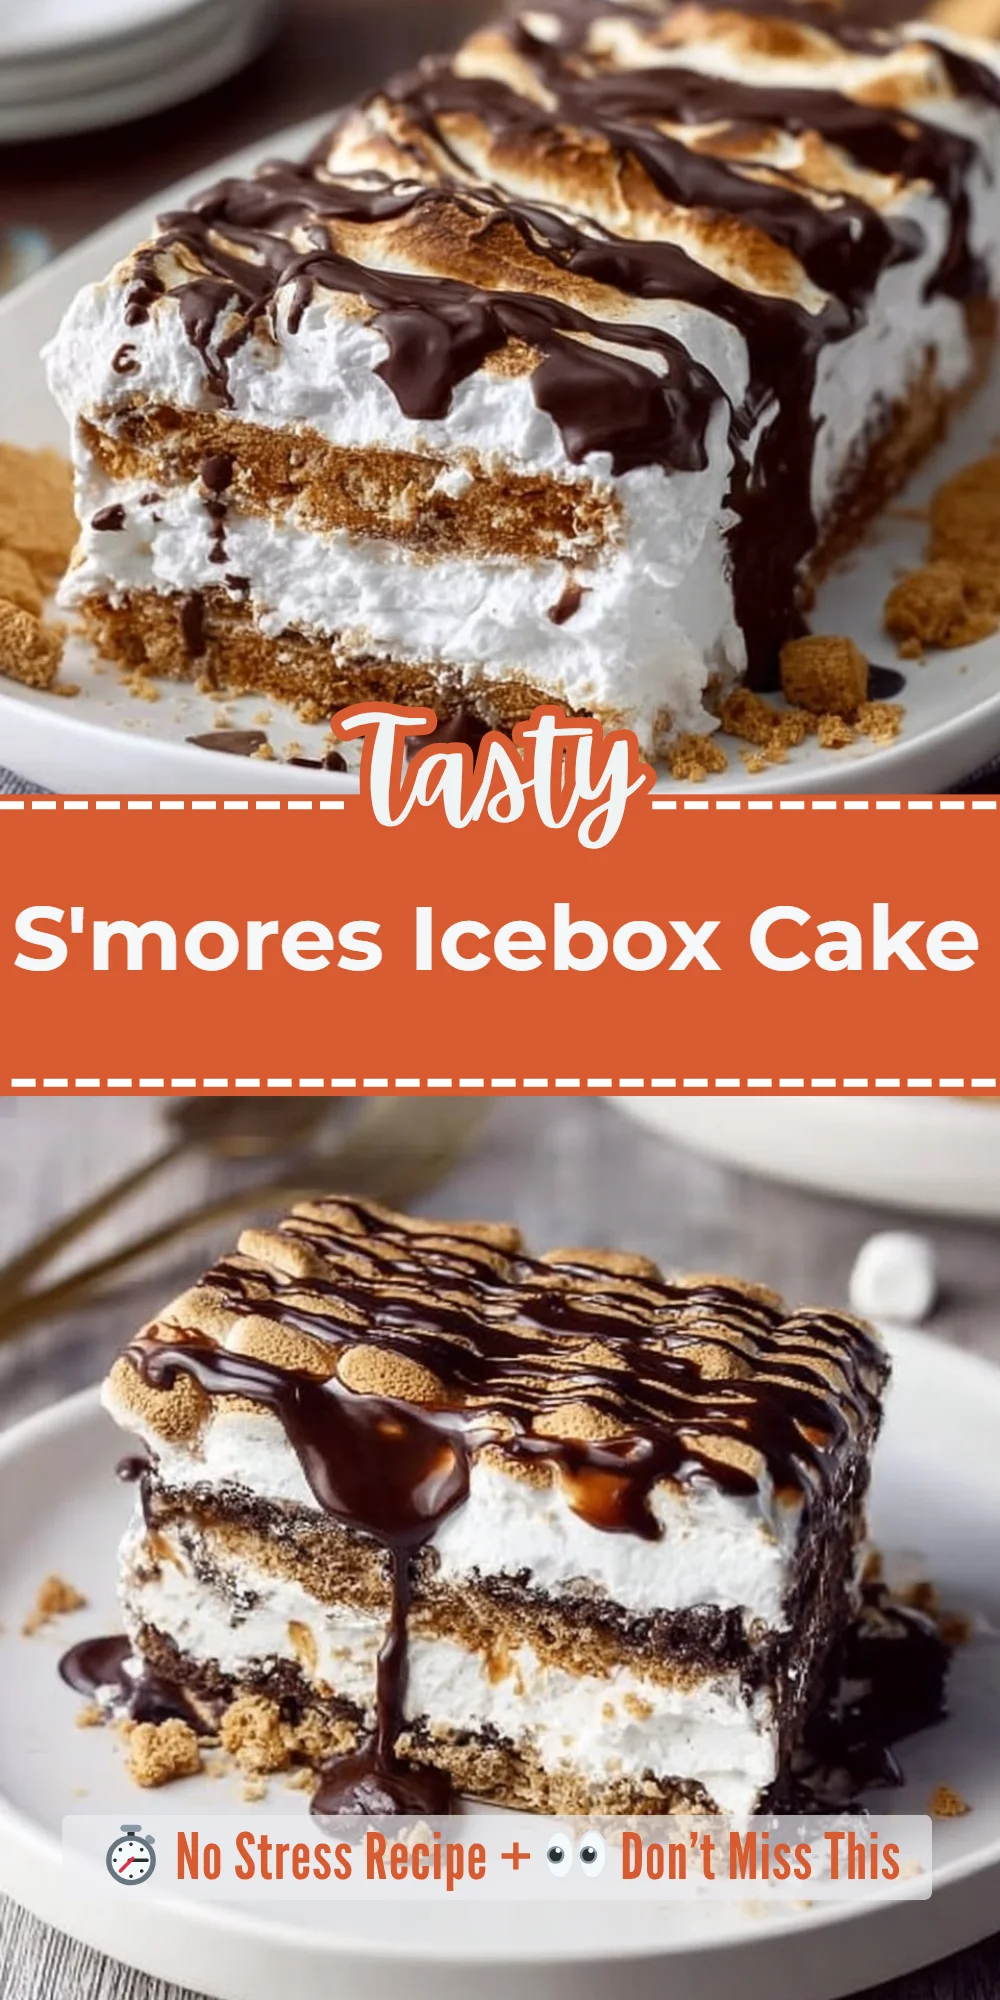
There’s something truly special about the combination of graham crackers, fluffy marshmallows, and rich chocolate that brings back the warm nostalgia of summer nights spent by the campfire. This S’mores Icebox Cake captures that spirit perfectly and transforms it into a beautifully layered dessert. Each slice reveals a delightful tower of textures, from the creamy layers to the crunchy bits of graham crackers, all balanced with the melt-in-your-mouth chocolate. It’s wonderfully indulgent, making it a staple in my kitchen, especially during warm get-togethers or cozy family nights.
The best part? This dessert comes together surprisingly fast! Perfect for those busy evenings when you want something sweet without spending hours in the kitchen. It’s also incredibly versatile; you can serve it at birthday parties, summer barbecues, or simply enjoy it as an evening treat with friends. And don’t worry if you happen to have some leftovers (if there are any!)—they keep well for days in the fridge and might even taste better after a day of chilling out.
Why I Love S’mores Icebox Cake
The magic of this S’mores Icebox Cake truly lies in its ease and flavor profile. It hits that sweet spot of nostalgia while being incredibly easy and undeniably delicious, making it a true winner at my table! Plus, it’s visually stunning—the layers create a sophisticated look that never fails to impress. Trust me, once you serve this, you’ll be the star of any gathering!
S’mores Icebox Cake Ingredients
The magic of this S’mores Icebox Cake truly lies in the harmony of its ingredients. Each component plays a vital role in creating that classic s’mores experience, just in a much more elegant form. Don’t worry about exact measurements just yet; those are all in the recipe card for you!
Essential Components
- 9 OZ DAIRY-FREE WHIPPED TOPPING: This acts as the light, fluffy base for our layers. I recommend using So Delicious CocoWhip for the best flavor and texture!
- 7.5 OZ JAR GLUTEN-FREE MARSHMALLOW CREME OR FLUFF: Adds that sweet, gooey goodness that everyone loves in s’mores!
- 2 CUPS GLUTEN-FREE MINI MARSHMALLOWS: These little gems pack a mighty punch of marshmallow flavor and add delightful pops of sweetness.
- 9 OZ DARK OR SEMI-SWEET CHOCOLATE CHIPS: I recommend Enjoy Life chips; they melt beautifully and add a rich depth to the cake.
- 3/4 CUP LITE COCONUT MILK: This creamy delight brings all the flavors together smoothly. Make sure to use canned coconut milk for that luscious creaminess!
- 2, 8 OZ BOXES GLUTEN-FREE GRAHAM CRACKERS: Kinnikinnick S’moreables are my go-to! They provide the perfect base for our cake.
Substitutions and Tips
Need a swap? If you want to switch things up a bit, consider these alternatives!
- Aquafaba instead of the dairy-free whipped topping gives a lighter, airy feel—though it won’t be quite as rich, it’s a fun vegan option!
- Nut butter (like almond or peanut butter) can replace the marshmallow fluff for a nutty twist that’s equally delicious.
- For a chocolatey kick, try adding a layer of Nutella or another favorite spread.
- If you’re pressed for time, store-bought graham crackers will work fine in a pinch—but homemade is always an option for the extra touch!
Kitchen Tools You’ll Need
- 5×9” loaf pan (or an 8×8 square pan for a larger version)
- Saran wrap (for easy removal)
- Medium bowl (to mix chocolate)
- Whisk (or electric mixer)
- Spatula (for spreading)
- Measuring cups spoons
How to Make S’mores Icebox Cake
Let’s dive into creating this delightful S’mores Icebox Cake. I’ve broken down the process into simple steps. Follow along, and you’ll have a delicious dessert in no time. We’re aiming for layered perfection that’s creamy, crunchy, and oh-so-satisfying!
Combine Toppings for the Creamy Base
Start by combining the dairy-free whipped topping and marshmallow fluff in a large bowl. Whisk until smooth, leaving a few marshmallow lumps for texture. This step is key to achieving that signature flavor. Fold in the mini marshmallows and refrigerate until well chilled.
Melt Chocolate to Create the Ganache
Next, measure out 2 tablespoons of chocolate chips and reserve them for topping later. Pour the rest of the chips into a medium-sized bowl. Heat the lite coconut milk in a microwave-safe dish for about 45 seconds until it’s gently simmering. Pour it over the chocolate chips and let it sit for 5 minutes; this allows them to soften. Whisk until smooth and set aside.
Line Your Pan for Easy Assembly
Now, line your 5×9” loaf pan with saran wrap, allowing it to hang generously over the edges. This is important for easy cake removal later! Start by scooping 1 cup of the marshmallow mixture into the bottom and spreading it into an even layer.
Layer with Graham Crackers
Next, add a layer of graham crackers. If necessary, cut or break graham crackers to fit perfectly into your pan. The crackers provide the delightful crunch we’re after!
Repeat Layers for Depth
Now, add another cup of the marshmallow mixture and smooth it out evenly. Follow with a 1/2 cup of the chocolate mixture, smoothing it over the marshmallow layer.
Pure Layering Bliss
Repeat these layers—graham crackers, marshmallow mixture, chocolate—two more times. Make sure each layer is even and well distributed.
Chill to Perfection
Cover the top with saran wrap, ensuring it’s sealed tightly, and refrigerate overnight. This helps all those lovely flavors meld together beautifully.
Unwrap and Serve
When ready to serve, remove the saran wrap from the top and invert the cake onto a cutting board. Gently pull on the overhanging saran wrap to remove the cake from the pan. Sprinkle the top with the reserved chocolate chips and some crumbled graham crackers for a pretty presentation. Slice it with a sharp knife, serving those delightful layers to your eager guests!
How to Store S’mores Icebox Cake
Leftovers are always a blessing with this cake! Just pop any uneaten slices into an airtight container in the fridge, where they’ll stay fresh for about 3-4 days. Enjoy them chilled or let them sit at room temperature for a bit! If you want to keep it longer, feel free to freeze individual slices for 2-3 months. Just thaw overnight in the fridge before serving—easy peasy!
Tips for Success
- Use high-quality chocolate chips for optimal flavor.
- Ensure your layers are even for a beautiful presentation.
- If the marshmallow fluff is hard to blend, gently warm it for easier mixing.
- Be patient while letting the cake chill overnight—those flavors are worth the wait!
Serving Suggestions
- Serve with fresh whipped cream for extra indulgence.
- Pair it with a scoop of vanilla ice cream for a decadent treat.
- Drizzle with chocolate sauce for added richness.
- Enjoy it with a warm cup of hot chocolate for the ultimate cozy experience.
- Garnish with toasted mini marshmallows for that campfire feel.


Leave a Comment